Creating beautiful works of art from colored glass is a hobby that has captivated people for centuries. Stained glass windows bring a unique look to homes and churches, and the process of making them is both an enjoyable and challenging experience. Crafting stained glass windows involves selecting and cutting glass, applying copper foil, soldering, and polishing. The journey of creating a stained glass window is a rewarding one, as the artist has the satisfaction of creating something that can be admired and enjoyed by many. From delicate flowers to awe-inspiring scenes, the possibilities are endless when it comes to stain glass windows. Whether you are a beginner or an experienced artisan, the hobby of making stained glass windows provides an outlet for creative expression and a chance to make something truly unique.
What is a stained glass window?
A stained glass window is an artistic window made from colored glass. The process of making them dates back hundreds of years, with the earliest known blue stained glass windows dating back to 964 CE. The tradition of making colorful stained glass windows is practiced all over the world, although there are regional differences in style. The most common types of stained glass windows are windows with patterns, windows with pictures, and windows with religious themes. The first two types can be used for any type of building, while the latter is typically found in churches. Stained glass windows are both functional and decorative, bringing light and color into any room. The use of stained glass windows was once reserved only for the wealthy, but nowadays they can be found in homes, churches, museums, and other buildings. While they are most commonly used as windowpanes, they can also be used to create skylights, doors, and other features of buildings.
Materials needed to make stained glass windows
- Glass - The glass used in making stained glass windows is a mixture of different colored glass pieces melted together in a kiln. The process of melting the glass is called “fusing.” This type of glass is known as “stained glass.”
- Copper foil - The foil acts as a “soldering surface” that holds the pieces of glass together while they are being worked on.
- Squeeze - This is a putty-like material that holds the glass in place while it is being put together.
- Hammer - The hammer is used for a variety of tasks, such as removing bubbles from the glass, straightening the edges, and flattening the copper foil.
- Saw - The saw is used to cut the glass pieces to the desired size, width, and length.
Selecting and cutting glass
When selecting the glass for your windows, it is important to choose glass that has vibrant colors and is free from defects and other imperfections. The glass pieces should be the same thickness, which typically falls within the range of 1/16 inch to 1/8 inch. If you are making a very large window, it is important to select glass pieces that are of the same thickness throughout the window. Small glass pieces can have their edges filed to ensure they are consistently the same thickness. For best results, the glass pieces should be perfectly clean. The glass can be cleaned with a glass cleaner, but it is most effective if you also use a soft, lint-free cloth. You can also use a paper towel, but make sure that it is not too rough. While selecting and cleaning the glass, make sure that you do not get any dirt or debris on the copper foil.
Applying copper foil
The copper foil is applied to the back of the glass pieces to provide a secure surface for soldering. It is best to apply the copper foil to the back of the glass before you start assembling the pieces. Ripping off the foil and reapplying it after the pieces have been put together can cause the glass to break. To ensure that the foil is applied evenly, use the “tape and rule method.” First, use a tape measure and a ruler to measure and mark the foil to the desired length. After you have measured and marked the foil, place the ruler on top of the foil, and use the tape to secure it to the foil. The tape provides a straight and secure line for the ruler, making it easier to apply the foil evenly.
Soldering
Soldering involves melting the copper foil and the two pieces of glass together. The copper foil acts as the “weld” that holds the pieces of glass together. The glass pieces and copper foil should be clean and free from any dust or debris. You can use a torch to melt the copper foil and the glass together. To start the soldering process, hold the torch with the tip facing the copper foil. Move the torch back and forth along the glass and copper foil until they melt together. After they have melted together, turn off the torch.
Polishing
The last step in making gorgeous stained glass windows is polishing them with a piece of “wet and dry” sandpaper. The sandpaper will remove any excess solder and shine the glass. After you have finished sanding the glass, they are ready to frame and hang. If you have always wanted to try your hand at making exquisite works of art from colored glass, stained glass windows are the perfect project for beginners to start with. They offer a unique look to homes and churches, and the process of creating them is both fun and challenging. Once you have created your first window, you may find yourself hooked and eager to try out new designs and patterns.

 Outdoor Landscapes as References to Paint
.png?size=50)
 Transform Your Life Through Yoga: The Benefits of a Regular Yoga Practice
 What are Virtual Reality Haptic Gloves?
 Try Creating Decorative Glass Mosaics
 Glass Etching and Glass Engraving
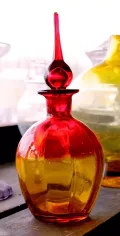 Craft Hobbies that Involve Glass
 Blowing Glass is an Amazing Hobby